
Understanding Vapor Barriers
What is a Vapor Barrier?
A vapor barrier is a material that helps prevent moisture from passing through walls, ceilings, and floors, effectively reducing humidity and improving air quality in a building. Typically comprised of polyethylene sheeting or specialized coatings, a vapor barrier is essential in areas where moisture is prevalent, such as basements and crawl spaces. It acts as a shield, protecting materials from rot, mold, and structural damage that can arise from excess moisture.
Importance of Vapor Barrier Installation
Proper installation of a vapor barrier is crucial for maintaining a healthy and stable environment within a home. It prevents water vapor from entering structural spaces, which can lead to mold growth and damage. Furthermore, moisture can significantly affect energy efficiency, as damp areas require more energy to heat or cool. Therefore, implementing Vapor Barrier Installation is not just a matter of comfort but one of essential home maintenance.
Types of Vapor Barriers Available
There are various types of vapor barriers available in the market, each suited to specific needs. The most common types include:
- Polyethylene Sheeting: This is the most commonly used vapor barrier, available in various thicknesses, usually between 6 to 20 mils.
- Foil Barriers: These reflect heat and can serve as both insulation and a vapor barrier.
- Sealants and Coatings: Liquid vapor barriers offer flexibility and can be applied to any surface, providing superior coverage.
- Pre-fabricated Products: Some products come pre-fabricated with additional insulating layers, making them versatile.
Preparing for Vapor Barrier Installation
Assessing the Crawl Space Conditions
Before installation, assessing the crawl space conditions is vital. Check for existing moisture issues, mold growth, and the presence of standing water. An ideal crawl space should be dry, well-ventilated, and free from debris. If water issues are present, they should be addressed before proceeding with the installation of the vapor barrier, which might involve repairs or drainage solutions.
Essential Tools and Materials for Installation
To ensure a smooth installation process, gather the following tools and materials:
- Vapor Barrier material (polyethylene sheeting, foil, etc.)
- Utility knife or scissors
- Stapler or adhesive
- Sealing tape
- Measuring tape
- Paintbrush (for liquid barriers)
- Gloves and safety goggles
Safety Precautions to Consider
Safety is paramount during installation. Always wear gloves and safety goggles to protect against sharp materials and chemicals. Ensure proper ventilation in the crawl space, particularly if you are using sealants or coatings. Additionally, be cautious of any electrical wires or plumbing that may be present in the area.
Step-by-Step Vapor Barrier Installation Process
Removing Debris from Crawl Space
Begin the installation process by clearing the crawl space of any debris. Remove rocks, old insulation, and any organic materials that could foster mold growth. A clean surface is essential for the effective adhesion of the vapor barrier.
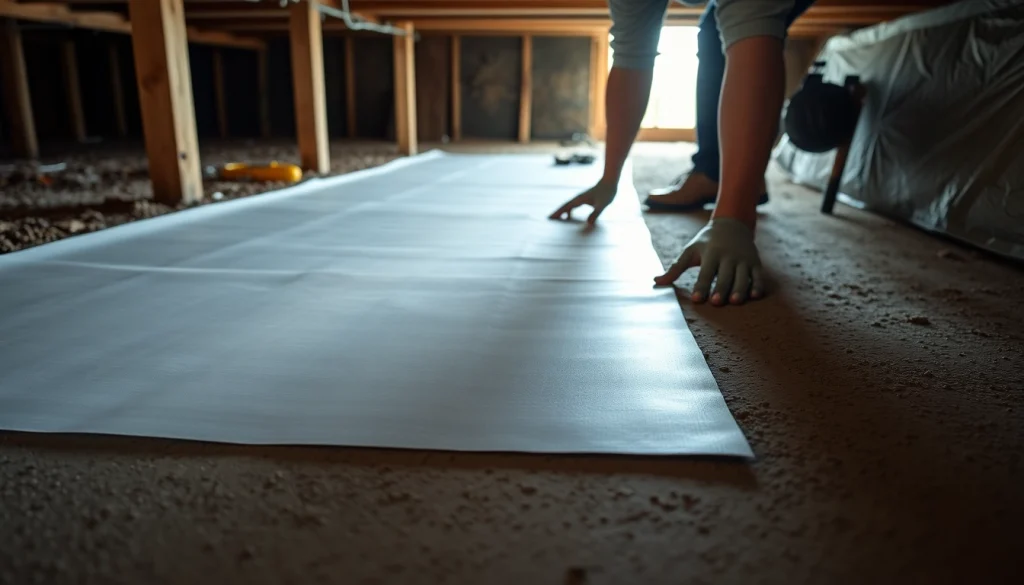
How to Properly Install Vapor Barrier
To install the vapor barrier, follow these steps:
- Measure and cut the vapor barrier material according to the dimensions of the crawl space.
- Lay the material on the ground, ensuring it extends a few inches up the walls or piers.
- If using a roll, unroll it slowly across the entire surface area.
Sealing and Overlap Techniques
To ensure a seamless installation, overlap edges of the vapor barrier by at least 12 inches and seal them with tape. Use a strong, waterproof tape to seal the edges and any seams. For areas where the barrier meets walls, secure it using a stapler or adhesive to prevent moisture ingress.
Post-Installation Best Practices
Maintaining Your Vapor Barrier
Once your vapor barrier is installed, regular maintenance is crucial. Inspect the barrier periodically for any tears or damage. Ensure that no moisture accumulation is taking place on or under the barrier. If any issues are detected, repair or replace the vapor barrier promptly.
Monitoring Moisture Levels
Utilize a hygrometer to monitor moisture levels in the crawl space. Ideal humidity levels should be between 30-50%. If levels rise above this, it may indicate either a significant leak or inadequate vapor barrier performance, signaling the need for further investigation.
Recognizing Signs of Damage
Be vigilant for signs of damage in the crawl space, such as mold, mildew odors, or visible moisture on surfaces. If you notice any of these issues, it might be necessary to reassess the installation of your vapor barrier, ensuring it’s still performing as intended.
FAQs About Vapor Barrier Installation
How long does a vapor barrier last?
On average, a well-installed vapor barrier can last 15 to 20 years. However, environmental conditions and maintenance can affect its lifespan.
Can I install a vapor barrier myself?
Yes, a vapor barrier can be installed by a homeowner with basic DIY skills. However, proper assessment and preparation are key for effective results.
What are the signs of a failing vapor barrier?
Signs of a failing vapor barrier include visible mold growth, increased humidity, and moisture stains on walls or flooring within the space.
Is insulation necessary with a vapor barrier?
While a vapor barrier controls moisture, insulation is often recommended for temperature regulation and energy efficiency in crawl spaces.
How does a vapor barrier affect indoor air quality?
A properly installed vapor barrier can significantly improve indoor air quality by preventing mold and allergens from entering the home’s living spaces.